Sunday 22 July 2012

Back to the Optima (suspension)

Ok, i love back to the future, since it was so 80's. So thats how i came up with this title. I was supposed to race my Mid in a race last week but i broke one lazer ZX front c hub while casing a big jump. I got so fed up and went back to the original Optima Mids suspension. One of the biggest reasons was i had  a pair of A & L alumimiun C hubs with bearings and i think i could practically bulletproof the suspension with these c hubs.
The A & L C hub, with 4x8x9x3 flanged bearings.
Thats a ZX-5 plastic knuckle. i ground off 2mm from the top of the knuckle to be 20mm then only it could enter the c hub.

another view.

Rear Optim Mid Suspension with the arms flipped so that i can place the shocks at the rear like the lazer. Thi is done so that i can clear the new layshaft .

Position of shock on shock tower.
I tried the car today on the terrible offroad track and it was much better than before, simply because i removed the durango shock boots that was interfering with smooth suspension movement. the Mid could clear the big jumps most of the time and landings were good. It also handled the bumpy sections rather well. Of course the tree roots still posed a problem, but the car was definitely better. Also since i was using modified kawada touring car knuckles, the mounting for the kingpins was too short causing the kingpins to dislodge itself and ending my testing. i went home and then decide to grind off the ZX-5 knuckle by 2mm at the tops so that i can slide it into the c hub.The zx-5 kunckles felt a lot more secure, and the kingpins felt secure in them too. i think i pretty much nailed this problem with this solution. will test again the next week.

Tuesday 1 May 2012

Big Bores, Such a boar??

I finally tested the big bores on my Optima, and at first i had 20wt oil in them , and they were too soft. it was bottoming out too easily. i took the advice of some drivers at the track, and put 50wt oil in the front, and 30wt in the rears. The car is now much easier to drive and i am finally clearing the jumps, small and big most of the time ! Before it was only some of the time. I also tried to place the front shocks to give it more ride height and droop, and i found that the car goes over the small bumps much better instead of nose diving, so it goes through the whoop de does much quicker. I also learnt a technique to clear the big jump, go up the hill quickly build momentum to the jump and at the end of the jump brake, the car will land nicely on the backside of the landing jump. However i still find the car under powered with a 10.5T, so the next step is to get a 9.5T or 8.5T. Also it seems my 5 year old Speed Passion GT1.1 ESC is finally giving way. after a few hard bumps, the calibration of the ESC went off. I had to recalibrate a few times. Now i have to buy a new BL sensored ESC and motor for my buggy, more expense needed, becuase of the coming race on the 25th. I managed to break a front right lazer arm and bend the RCPS titanium hingepin from hitting the backside of the jump squarely. So now i place ZX-5 arms and uprights on the front end of my Mid. I will also drill a few more holes on the rear of the James Instone shock towers to give the rear a little more ride height and droop becuase it seems to snag at the cement hill bank while going up, losing some speed build up for the big jump. will report back in 2 weeks. In the meantime i will be driving my Kawada SV-10 Alcyon II this weekend and giving my Optima Mid a rest. Dont worry it will come back with a vengeance !

Monday 19 March 2012

Some Old Pics

Here are some old pics of my cars, many of  them of the optima mid


Friday 17 February 2012

OT-66 has arrived, Marwans repros

I got My OT-66s and i cant wait to test how they work against new tech tyres.
Optima Mid Custom Body with Original rims and OT-66 tyres

Turbo Optima Mid Special Body with Original rims and OT-66 tyres

Which one looks better? i alternate between both bodies since the undertray is the same.
I tested the tyres on a slightly damp and muddy track, and with some sections of grass, and i am glad to report that these tyres work better than modern proline M3s on that surface. This is becuase the M3s have short spikes, becuase of that, when the mud covers the tryes, there are no more spikes digging through the earth. Becuase of that the car understeers. The OT-66 on the other hand is of a harder compund and the spikes are long and far apart, so mud cant really obscure the spikes, so they dig right into the earth, giving your car more grip. not only that, becuase the fronts and the rears are wide, my car actually had more steering than with the modern tyres ! i will try these tyres in the next race in subang if the track is wet. Even if the track isnt wet i might use it for 1 heat just to try them out.
With Optima Mid Custom Special Body, in the dirt !
Optima Mid Custom Special

Saturday 11 February 2012

Broken Parts - Watch Out

Over the course of the first post on this blog until now, i have damaged and broken numerous parts on the Optima Mid. I will let you know which parts broke or bent and how to remedy them.

1. Graphite Chassis. Do not use this chassis if you intend to race hard, it will snap, look at this pic.
All i did was jump high and land hard, and i did slammed into hard packed jumps many times too. Graphite will crack, take my advice, stick with the OT-122 Aluminium chassis. Its heavy but it will never snap.

2. Stripped front gearbox threads. Fixing it is simple, see my previous entry about the bolt and nut method to secure the gearbox. Dont forget to seal the holes with silicon.
3. Cracked rear gearbox at 2 wingmounts. After several months of tumbles and rear wheelies, the wingmounts still last, but it teared the rear gearbox wing mount, exposing the rear tranny to dirt, and i have to open everything again to clean them up. Since i am using lazer ZX-R shock towers, i will replace the wing mounts with ZX-R mounts part number UMW-1. I think i should rename my car Turbo Optima Mid Special ZX-R.
4. Bent inner hingepins. Do yourself a favor, buy RCPS titanium hingepins ,and drill out the arms with the drill bit and instructions given. These hingepins wont bend.
5. Cracked rear gearbox mounts
I tried a new way to hold the rear arms without using e clips on the inside, by using airplane wheel retainers in the arms and e clips on the rear. So what happened was i was at glenmarie track jumping the car hard and hitting track barriers, and then suddenly my rear arms look like they came off. To my horror i found the screws holding the rear arm brace is still intact, but the plastic thats its screwed into, detached itself from the gearbox!

The solution to prevent this is simple, place pack the eclips at the rear of the arm brace, that way the load on the arms will be shared by the inner arm brace and not all loaded on the outer arm brace.

Thursday 2 February 2012

My Video

This is the link to my new video.
Snapshots from my video


Friday 27 January 2012

List Of Hop Ups On My Optima Mid

Some of you might be wondering what are the parts i have changed on the car. Here i will tell you the part numbers and why i changed them.
1. LA-26 Lazer ZX Suspension Arm set
These arms are longer than the Mids, and needs less force to achieve same leverage, becuase of this they handle bumpy surfaces better and generate more grip.
2. LA-59  Lazer ZX-R Front C hub
3. LA-28 Lazer ZX Rear Hub
4. ZXSJI 11 FibreLyte Lazer ZX Rear Shock Tower
Strong graphite tower that allows more angle positioning choices
5. KYZXR 04 Fibrelyte Lazer ZX-R Front Shock Tower
Graphite shock tower in a closed loop with many many choices for upper shock position
6. OT-16 Plastic Knuckles
Holds the bearings tightly and wont develop slop like the magnesium hubs.
7. #5028 A & L Steering Bellcrank with bearings.
Good strong steering system without slop, but needs to be modified by user.
8. LA-245 Lazer ZX-5 62.5mm CVD (all 4 wheels)
Smoother power delivery and also easier to get than original UJ's.
9. Latest Ultima Ball Cups and ball studs
To replace all the worn out ball links
10. Associated B4 slipper clutch and spur gear with custom machined top shaft

Easier to get pinions and also to drive the car with a slipper
11. OT-122 Aluminium LWB chassis
The graphite chassis can actually break, hardened aluminium is heavier but wont break.
12. Ball Diffs Front & Rear
Works better than gear diffs will see differnce especially on landings.
13. Yeah Racing Blue Aluminium hexes
Looks cool, cheap price, and uses pin.
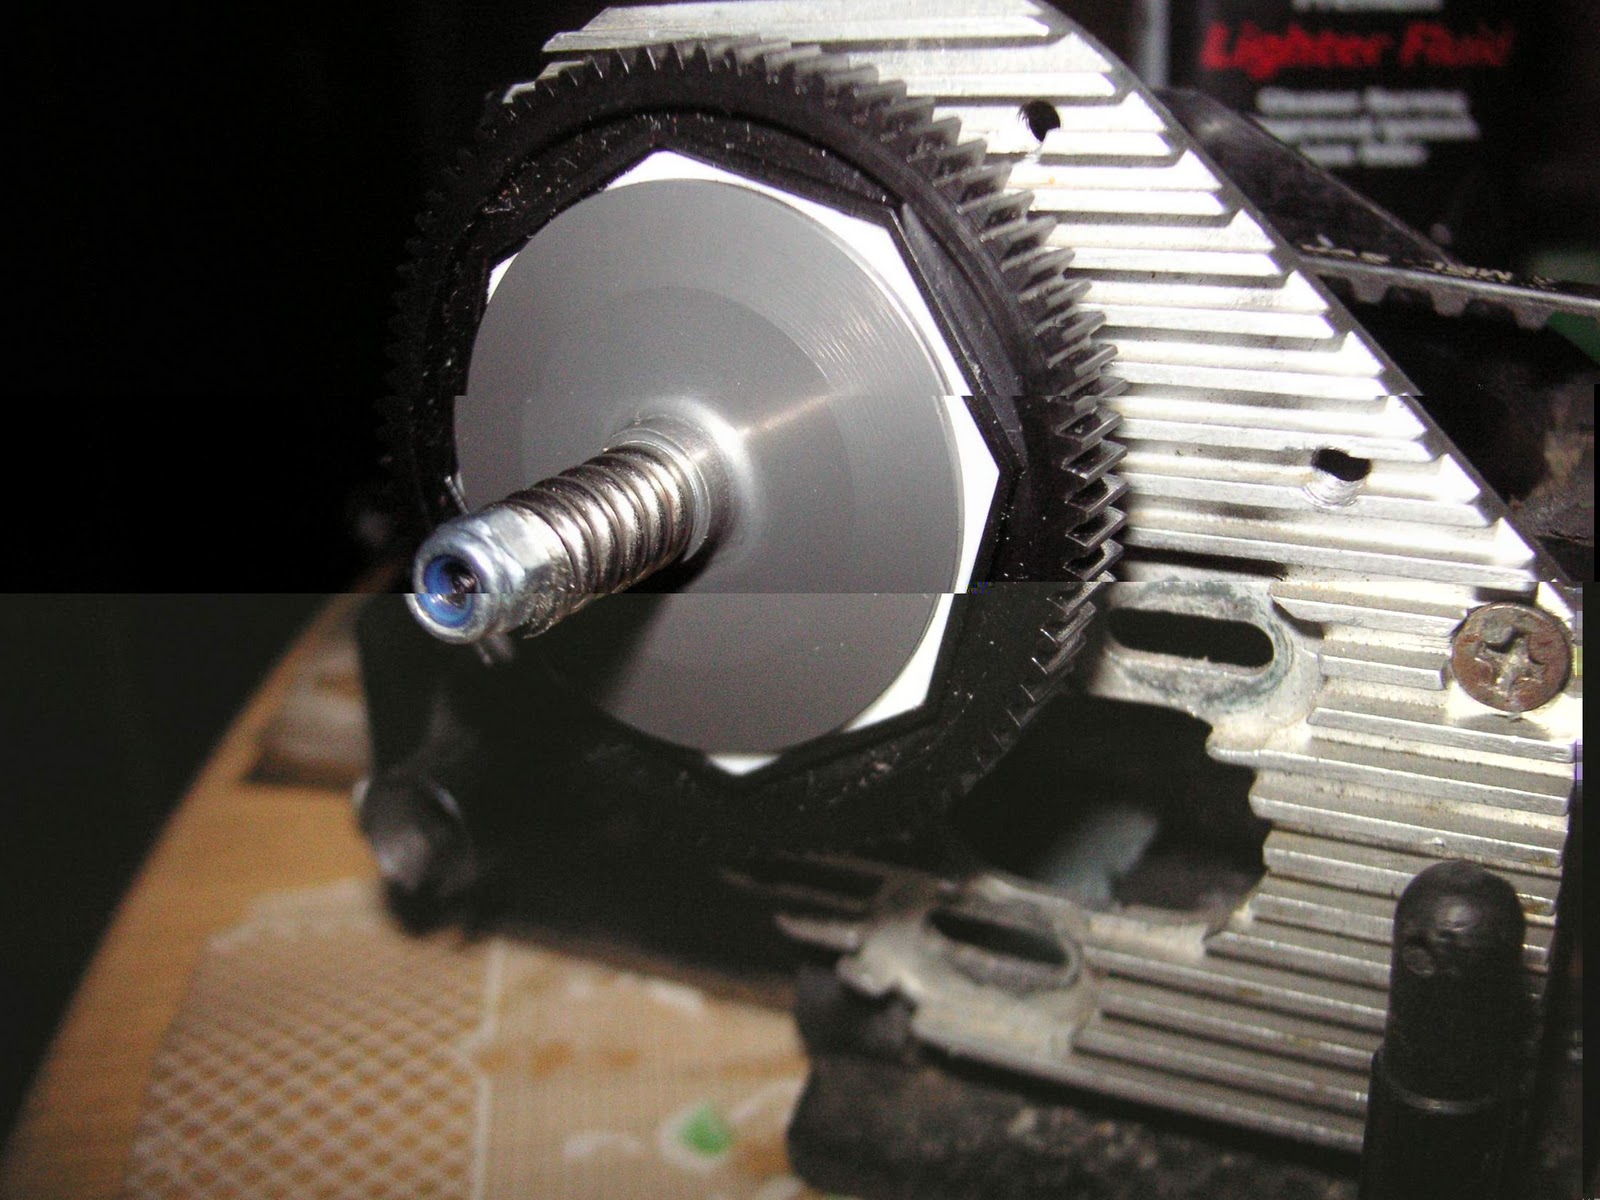
14. Pargu2000's Aluminium center gear

Add strength and lastability to the tranny
15. A & L motor plate
Dissipates heat better than stock motor plate
16. Coming Soon..Modern Kyosho Big Bore Shocks & Springs !

Tuesday 24 January 2012

Narrow Front End, it works !

I spent a few hours setting up my front end to be narower. i tried the car today at the race track, and i am happy to report that the car has more steering now ! i went up againste a durango DEX410 which had a 7.5T motor, mine was a 10.5T, it was difficult to keep up with him, but at the corners, i was sometimes able to outcorner the durango, i literally was able to cut into his line at the corners! it was great. i also did not break anyhting on my MId, testament to kyosho old parts quality. I also tried the old mid special tyres, and they only work great in the extremely loose sand area, whern the spikes can really dig in. On the hard packed surfaces, the car was skating everywhere. i Swithced back to the Prolines M3 and i got a lot more traction on the hard packed surface, not to mention better bump absorption. The sealing i done on the gearbox and belt covers also paid off, my drive line is as smooth as the day i put it together.

Saturday 21 January 2012

Wheels to use on the Optima Mid and Lazer

I dont why, but  ifeel the old tyres look better than the new ones, the old ones really look like buggy tyres, but the new prolines look like truck tyres.
If you bought modern kyosho wheels like me becuase they were easily availabe at your hobby shop, you would have found a big problem that could affect handling.
The tyres above is the ZX-5 RTR (ZX-R) Rims and tyres, notic the front is wider than the reasr, thats the way ist supposed to be
The tyres below is the modern ZX-5 SP/FS2 rims with proline tyres, notice the rear trackwidth is wider than the fronts! a big no no. since i already bought them i might as well use them first.
The correct rims for your Optima Mid is W5026W front, and W5028W for rears. You can use any tires with them.
Ok i ran the car about 2 hours ago at alocal abandoned MTB track. Met 3 guys with HSP (china brand) SC trucks. When the saw my optima mid in the sand over the bumps, their comments was, ..the suspension really soaks up the bumps ! They said my car handled really well, when theirs bounce like hell !
The Mid jumped well and kicked a lot of sand, but i find the car understeered too much to my liking. Even though i slowed down for the turns, the car seems to push wide, only if the surface is sandy, when i gas it hard then rear will swing around and i have to countersteer to keep it in control. I did some reasearch on the internet about front and rear track width, and i found something odd. It seems having a rear track width wider than the front, you will get MORE steering, and front track width wider, less steering. The thing is my rears are now wider than my fronts, yet i still dont have enough steering ! I will still go ahead with the old ZX-R rims the next round , and keep the front hub on the outer hole. I will also try to put the front hub on the inner hole to reduce the front track width and see how it handles,  if I do indeed get more steeering.

NEWSFLASH, last night i took of the front LA-59 hubs and change the 3racing 65.5CVDs to Kyoshos LA245 62.5 CVDs. Placing the C hub using the outer hole reduces the front trackwidth, and also reduces the caster. These 2 changes alone should make my Optima Mid Steer better. The track width will increase grip, and the less caster will increase initial steering, something i am lacking right now. Becuase of that also i had to change the camber link location on the front, i had to use the outermost hole on the hub, so now my camber links are longer, this should give the front end more roll and more grip as well. This should work well on the optima mid becuase it is a rather rear heavy car unlik todays cars which only have small rear bias percentage. The Optima Mids rear is 200g heavier than the front ! The problem is my original Mid Rims cant fit in, unless i reduce some wahsers at the outer part of the upper link. Also another annoying problem is the new Kyosho front rims has lots of ribs in them, these ribs actually interfere with the outer hingepins! i Put in a 4mm washer in between the wheels and the hex and this spaces out the front wheel enough so that it wont touch the hingepins anymore, as a temporary solution. It seems kyosho is discontniuing the production of the ZX-R rims, so i will get them while stocks last.

How To seal the optima mid's drivetrain, and tips for easier maintenance


As many of you all know, th Optima Mid is not an easy car to work on, and maintenance work can be very difficult and time consuming. During my cteenage years , i spent alot of time taking apart the car and cleaing the gearboxes and diffs, i always followed everything in the manual and only used the car with original parts cause i couldnt really think for myself. Fast forward 20 years later, being and engineer designing machines, and applying my knowledge and experiments on touring cars, i managed to find a lot of ways to improve and lengthen time for teardowns and rebuilds on the optima mid.
I thought to myself, i must seal the gearbox properly and not allow any sand to get into the gearbox , and also must find someway that i dont neeed to take apart the diffs for maintenance.
Firstly look at the 1st pic, its selleys silicone sealent. The stuff works wonders, when its in it freshest state, its kind of jelly paste like, when it dries up, it becomes like a flexible rubber like substance,that can be removed by hand later by pulling it out, very good for sealing your optima mid's belt covers.
Buy this tube of sealent at your local hardware store, it fills and seals the gaps in between your belt cover joint areas.
To stick your beltcover on, use 3M high strength thin double sided tape.
The optima mids gearbox is made of high grade plastic, but the front gearbox is especially prone to stripping its threads after so many times removing and retightening the screws, and also form hard collisions. An easy way to remedy this is to drill through the mountin holes at the bottom. But it will expose the gearbox innards to sand. Drilling through with a 2.5mm drill bit will allow you to use longer screws ,in this case i used a 20mm screw to hole the bumper in the 1st front 2 holes, since there are 2 holes esposing the gearbox internals, use the silicon sealent to seal them, like shown in the picture. That T sysmbol is team Tanaplan.

Notice the silicon paste in between the belt cover and the front gearbox, and also in between the bottom of the gearbox to the chassis, also at the suspension mounts. I drilled a hole through the last 2 holes holding the gearbox to the chassis, so that i can place a nut to securely hold down the gearbox. You have to use a 14mm screw so that it will go beyong the suspension mounts. Since the drilling exposes the innards of the gearbox, you have to use silicon sealent to cover the hole back after tightening your nut. Dont forget to use sealent on the under belt cover under the upper deck.
See the 3M tape used to mount the upper belt cover, and the silicon sealent along the front seam of the belt cover to gearbox and top deck.
Sealent and thick double sided tape replaces the OT-103 sponge here to really seal the rear gearbox upper area.

Silicon sealent fills and closes the gap in between belt cover and rear lower gearbox.


Dirt can still get through one area , the diff side bearings, becuase ethere is asmall gap.
Use dishwashing sponge, cut up a thin slice, then cut up a hole in the middle with a curved scissors, the hole should be slightly smaller than the ball diffs output shaft. Yes i am using ball diffs again. Use silicon sealent to glue the sponge to the gearbox sides.To cut down times in between rebuilds, i bought ACER racing 3mm ceramic balls for my diffs, and greased the balls adequately. With the ceramic balls, and the side sponge sealing, you should not need to open the gearbox for at least 3 Months ! You only have to clean the wheel bearings and shocks, you dont have to touch the center part of the car! amazing isnt it?
The thrust bearings get dirty easily and contributes to the diffs gritty feeling. You can remove the diff outdrive like shown here, wihtout removing the gearbox ! Just unscrew the diff as shown, and pull out the output shaft, the bearings and spacers diff rings inside the gearbox will stay put becuse of the way kyosho designs them. Remove the thrust bearings, clean them then relube them, then simply place back the diff output shaft into the gearbox, voila, your diff is smooth again. If after you clean the thrust bearings the diff is still gritty, then you will have to open the gearbox and clean the main diff balls.But that should be a long long time before you need to that if you follow my tips ! Dont forget to put a small slab of sponge to cover up the thrust bearings to better protect your thrust bearings.